2D Art Tutorial
Add comment!May 21st, 2009
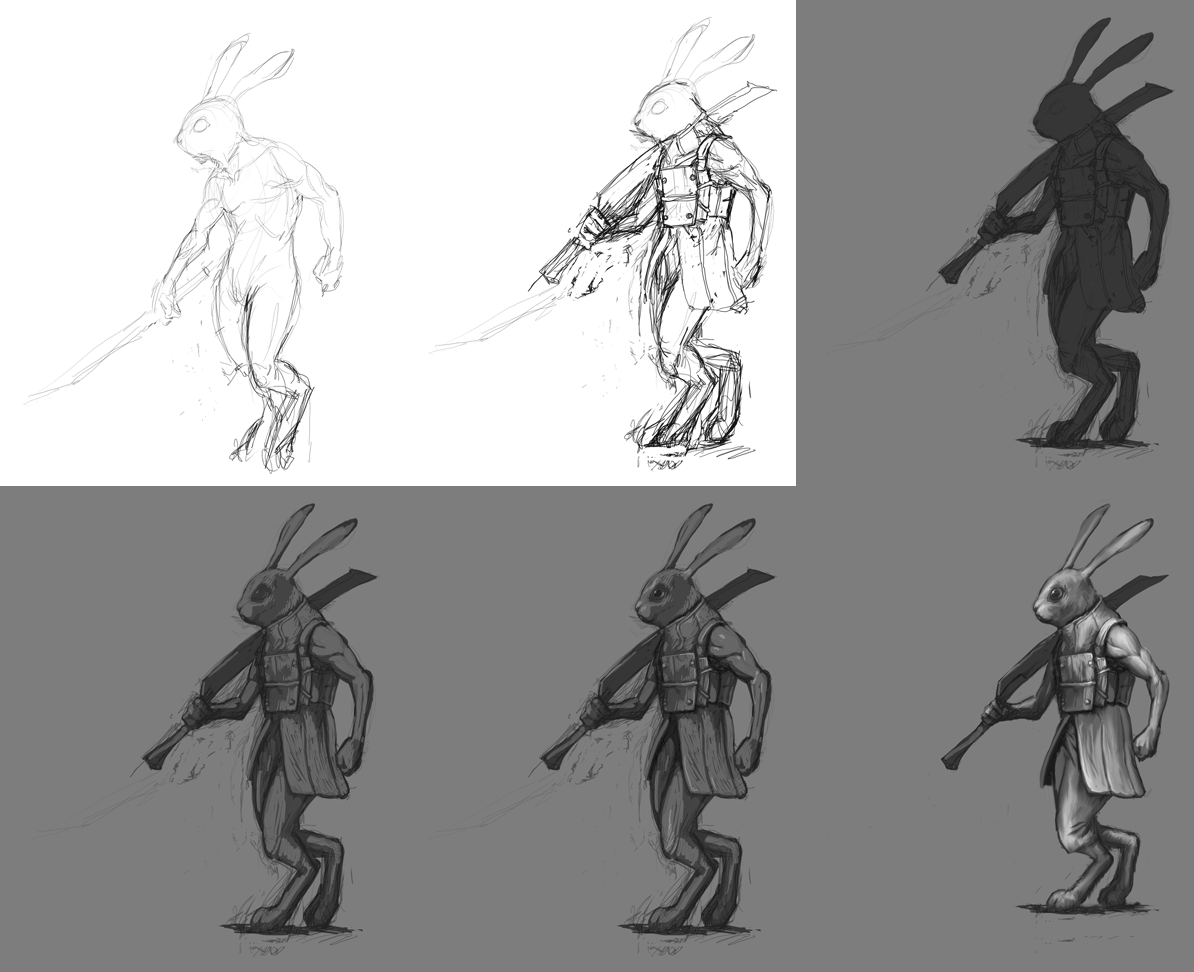
A lot of people are interested in the process I go through when I make a concept drawing for Overgrowth so I decided to make a short tutorial.
Above is an animated gif demonstrating each step (click it to download). Here is an explanation of each one:

1. I usually start out with a simple line drawing. Often it is not that great.

2. Then I start working on the forms, trying to get a decent pose. I will select stuff and move it around when whole areas are in the wrong place.

3. Once I am happy with the basics I block in extra shapes for gear, maybe tweak a few things if there are still problems.

4. To start coloring I lay down a couple of layers of dark color, usually set to multiply.

5. This layer fills in the outline of the character.

6. Adding the shading is the hardest part. It is important to keep in mind the direction the light is coming from. Once the shading is in I like to smudge rounded areas to smooth them out.

7. As a final step, I will sometimes add an overlay layer to brighten up areas. In this case I thought the legs looked too long so I shortened them up a bit.


