Character normal maps
Add comment!October 3rd, 2009
We've discussed a lot of the subtle techniques we're using to make the Overgrowth characters look realistic, but we still haven't explained the most important graphics technique in modern games: normal mapping. You probably know that normal mapping lets us render detailed models very efficiently. But what is it actually doing?
Let's break the name down. The "normal" is a vector perpendicular to a surface, which we can use to calculate lighting. "Mapping" is usually used in graphics to describe the connection between a 3D model and a 2D image. So, normal mapping is when we create an image with high-resolution surface normal information, and map it into a simple model to make it look more detailed. Here's an example of a detailed model, a simple model, and the simple model with a normal map applied.
As you can see, the high-detail model and the low-detail normal-mapped model look almost identical, even though the high-detail model has too many polygons to draw in real time. In case you were wondering, the colors here represent the surface normal information. The red represents the x-component (how much it is facing right), green represents the y-component (how much it is facing up), and blue represents the z-component (how much it is facing forwards). Here's another comparison of these models:

From this distance, the left and right models look pretty much the same. In fact, since the lighting is exactly the same, there is no difference if you look at the surface details from the front! However, this technique isn't magic -- it can't add detail to the silhouette. If you look at the edges of the low-detail model, you can start to make out some of the polygons. Below is a close-up of some of the silhouette simplifications in the character's neck:

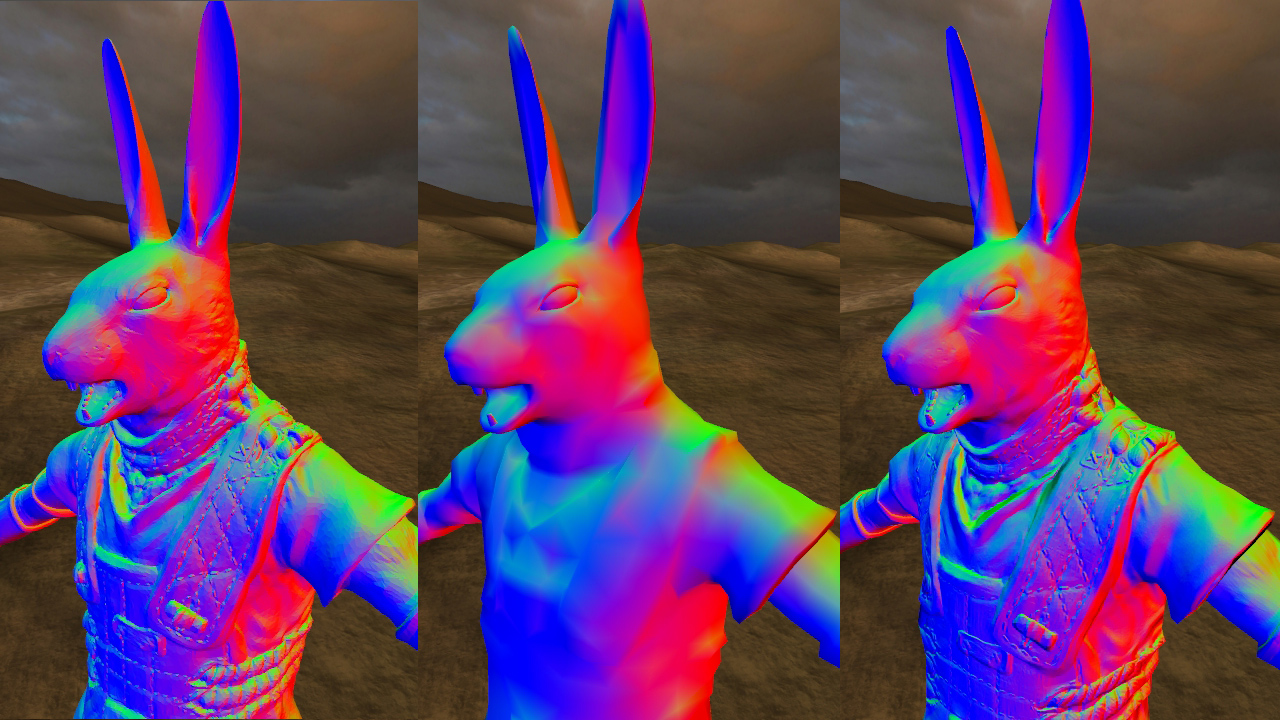
So now you get the idea of what normal maps do... but how are they made? We create them by 'baking' the surface information from the high-detail model into an image like the one below. The normal map is on the left, and its component channels (red, green and blue) are shown next to it.

Here the normal map is applied to the low-detail model, and you can see how each channel encodes the surface information along each axis. In this case, blue represents the y-component (up and down), red represents the x-component (left and right), and green represents the z-component (front and back).
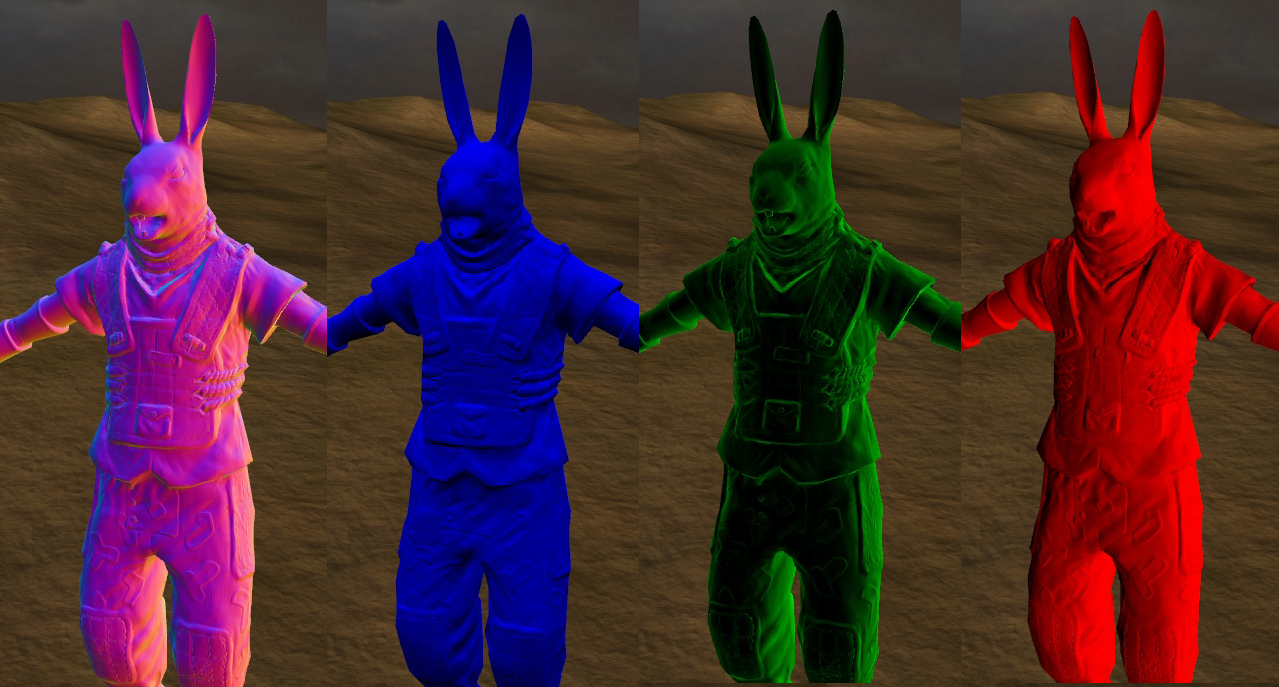
Once we have a normal map, it's easy to use it to calculate lighting from different directions. For example, if we have a light source directly to the right, we can just use the red channel. First we make it greyscale, and then scale it so that the entire left half is in shadow.

Using these three channels, we can calculate the lighting from any direction by just combining them with different weights. For example, if light is coming from up and to the right, we can just combine the red and blue channels. Of course, in the vertex shader I just write a general equation so we don't have to deal with each special case individually like this.

When it's all put together, the normal-mapped lighting provides an excellent foundation, so that the final result looks much more detailed than its underlying geometry. This allows us to deliver detailed visuals while keeping the framerate smooth and stable.

This is review material for anyone familiar with modern graphics techniques, but I hope it was informative to some of you! Our normal maps are different from those in most games, and easier to understand and work with, because they're stored in object-space instead of tangent-space. Maybe I'll write about that next time!